Thursday, April 5, 2012

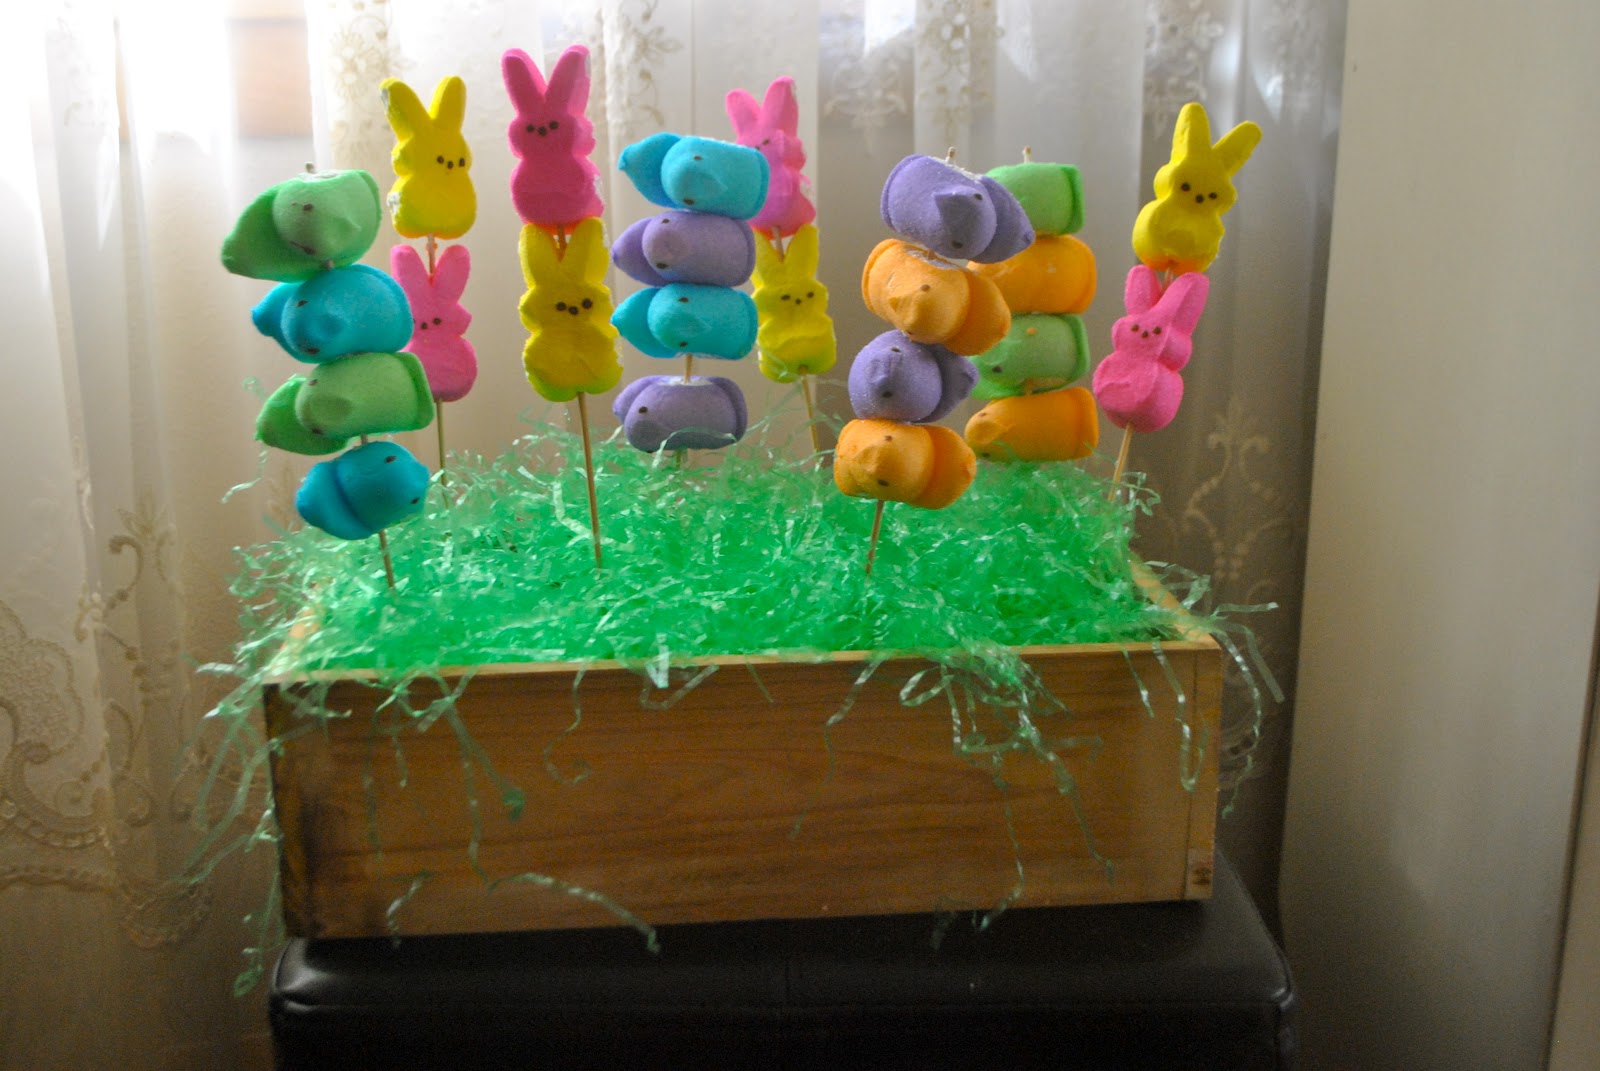
Easter peeps centerpiece

If you have 5 minutes and $5, you can make this centerpiece.


I wanted to do something special for my mom. She's always doing so much for everyone else. I grabbed peeps in every color, a basket I had sitting around, some styrofoam, kabob sticks, and Easter grass. Within just a few minutes I had made this super adorable Easter centerpiece.  

My mom and I both think that Peeps taste better when they've been exposed to air for a day or two or more! Right?! I think 'fresh' Peeps are seriously gross.

 
All you have to do is kabob the peeps and stick them into the styrofoam base. 


Fill it in with the bag of Easter grass. 

I added a quick little "hanging with my Peeps" tag. 


That's it! Well, except, I highly recommend putting a jellybean at the base of the marshmallow to keep them from slipping down. Within a few hours of making this cuteness, it was kind of a mess with peeps turning every way and slipping down into the grass. They definitely need a stopper. 

It's such a bright and cheery decoration. I just love it - and  so did my mom!  

linkin' up @DIY under $5

Sunday, April 1, 2012

i'm back

Boy, it's been awhile!
Did you miss me?! All 8 of my dear followers. :)

My hiatus started with the flu. So there was that. And it was followed by just a general lack of enthusiasm for any of my current projects. It happens. 

I've had a half completed project sitting in my living room (on my new awesome rug) for at least 2 weeks now. 
"Maybe tomorrow" has become a common phrase. 

I did have some success this past week completeling my to-do list. Unfortunately, it was full of "pay this and call them." 
I love striking things off with a thick line. I sometimes put the little tasks on just for the opportunity to cross them off!


And then yesterday morning, RUMMAGE SALE SEASON STARTED! Praise the Lord! Seriously. It's my favorite. I wake up willingly on the weekend to see what kind of treasures I can find. 

It was pretty cold out, and there weren't too many listed in the paper, but we managed. 


I told my mom that we need to take a picture of our loot every week. It probably wouldn't be a bad idea to note how much we spend too. Sometimes we get carried away. But mostly, we get some pretty practical stuff for a fraction of the price. Painters tape for .50: yes please. 7 mugs (perfect to decorate with a porcelain pen!)all for $1.50: yes please. A giant roll of freezer paper (that was on my shopping list already) for $1.00: hooray!

If nothing else, rummaging is cheap entertainment and a good excuse for my mom, sister, and I to hang out. Plus, there's nothing like looking at discarded randomness to spark my creativity.

Monday, March 19, 2012

large area rug DIY for under $30

A few years ago, when I visited my friend Kyrie's dorm room, I was beyond impressed with her area rug. I remember my initial assumption was that she didn't spend a ton of money on it because she just wouldn't have. But I was puzzled because it was seriously the coolest.

I eventually (or probably 2 seconds after walking in the room) commented on it and asked where she got such an glamorous rug.

This might have been the moment I knew we'd be friends forever.

She made it....
with carpet squares and duct tape!
Genius.

It's been a few weeks in the making (trial and ERROR), but I finally have my own DIY area rug- and I L.O.V.E it!


So awesome, right!?!?


I happened to find my carpet squares (randomly) on Craigslist.
But here are a few tips for going through a carpet store. 
1. Call around to several places and ask if they sell carpet squares (most do) and what kind of selection they have. 
2. Go to more than one store before you buy. 
3. I don't think it would hurt to ask if they'd take $1/piece.
They were asking $2 for large squares but I asked. I cut the cost of my project in half.
4. Chances are you won't find enough of the same color to make a monochromatic carpet. But, you should try to stick to one type of carpet to get a cohesive effect. 
5. Buy a couple extra squares if you can so that you have more to work with to get a pattern you're satisfied with.

Ok. moving on:

This was attempt #1. I learned some hard lessons.


I kind of lost my patients...big time! I didn't take into consideration that Kyrie made a much smaller rug and the flipping over process probably went better for her than it did for me. 


But sometimes the best DIYs take some perseverance.


I did a little research, found an adhesive that's made specifically for carpet, and tried again. 


I started out by tossing the squares down on the floor and playing around with the arrangement. My first attempt would have actually left me with a completely different layout:


but the second time around I had somehow realized there was another way:


After switching squares around for a little while playing with the colors, I got to the real work. Surprisingly, it took less than an hour.


Here's the adhesive I used. You can find in the carpet department of your hardware store. I payed under $4 a box and used about one and a half rolls. 


I used a regular pair of scissors to cut strips. The length varied depending on which seam I was binding, but ultimately didn't really matter as long as you use enough to form a bond. 


You then peel off the white piece, lift the edge of the carpet square off the ground, and slide it under halfway. Then firmly press the square back down, take the second square and put it over the other half. 


You've got yourself a sturdy seal. Now, just do this until every seam is connected. 


There will be some places where the pieces don't quite come together and there is a gap. You can't really tell unless you look closely. I did learn from my experience that my first layout had many more of these gaps because of the number of times four corners came together. 


I had bought some colored squares with my purchase just in case. I honestly hadn't planned on using them. I thought about leaving the small squares open to the hardwood. I thought it looked kind of cool. I thought about matching a fabric to my new wall art (that I'll be sharing later) but passed on that idea too. When I realized that the four colored squares coincidently matched my new art perfectly, it was a no brainer. I used a regular pair of scissors (although, a carpet blade probably wouldn't have hurt my hand so dang much) to cut the squares down to the appropriate size. 


I also bought 4 rolls of shelf liner at the Dollar Store to use as a gripper. I haven't done this yet. The rug is heavy enough that it doesn't slide around. I might do it just to add some protection for my hardwood floors. 


There you have it! I am so happy with it. I love how it grounds the room, adding a coziness that was previously lacking. And, of course, I love that the entire project cost under $30! 

Sunday, March 18, 2012

under construction

I hadn't really planned on it- but this blog is in the process of getting a little makeover. 


I'm learning a few things and think I like were it's headed. 

We'll see. 

I've also got a few really fun projects I'm excited to share this week. You don't want to miss it!

Thursday, March 15, 2012

spool storage/display

Imagine this for a second, will you: 
nearly 100 spools of beautiful, mostly vintage, sewing thread thrown without care into a plastic storage bin. 
Shameful. 

On Monday, I gave a sneak peak of one of the many projects I've been working on. With my dad's help, it turned out just as I'd imagined. 


drum roll please
bllllllllllllllll


Bam. Booya. Oh Yeah. 


The lowdown?

On one of my wandering adventures through the hardware store, I picked up two of these boards.


It's hard to see the awesome price! I really just bought them to make something. The label does say "hundreds of uses."
My dad simply (enough) cut and nailed the boards I had already painted into an old bulletin board that I had covered in burlap.  This entire project cost me $1.34 plus tax. 

BAM. BOOYA. OH YEAH.


This was my sewing table before: 


And now after:


It almost looks glamorous. You'd never know that I work in an unfinished basement with my fuel tank to my left and Christmas tree to my right! You'd also probably assume that I sew. ahahaha. Funny. This table is the least used one in my space- but at least now it's pretty. 

Thanks dad!